Carbon Fiber Lip Spoiler: Fitment, Material Engineering, and Installation Standards
A carbon fiber lip spoiler is a CFRP aero component mounted at the bumper edge to manage front-end airflow and increase high-speed stability with minimal mass. Performance and service life depend on fitment tolerance, laminate quality, mounting strategy, and UV-protective finishing.
What Determines Carbon Fiber Lip Spoiler Performance
- Fitment tolerance: Target ≤ 5 mm contour deviation to avoid preload stress and edge lift.
- Laminate process: Pre-preg and controlled cure improve resin ratio and repeatability versus basic wet layup.
- Mounting architecture: Tape + screws + reinforcement plates outperform tape-only setups under dynamic load.
- Surface system: UV-stable clear coat is mandatory for long-term gloss and fiber visibility.
Fitment Protocol (Year/Make/Model/Trim/Bumper)
Correct fitment is the highest-impact variable for a carbon fiber lip spoiler. Validate facelift status, sport package, OEM vs aftermarket bumper, sensor layout, and undertray geometry before purchase.
High-Risk Misfit Cases
- Facelift and pre-facelift bumpers with similar visual design but different mounting points.
- M Sport / AMG Line / S-Line valance geometry differences.
- Aftermarket bumper conversions without OEM reference points.
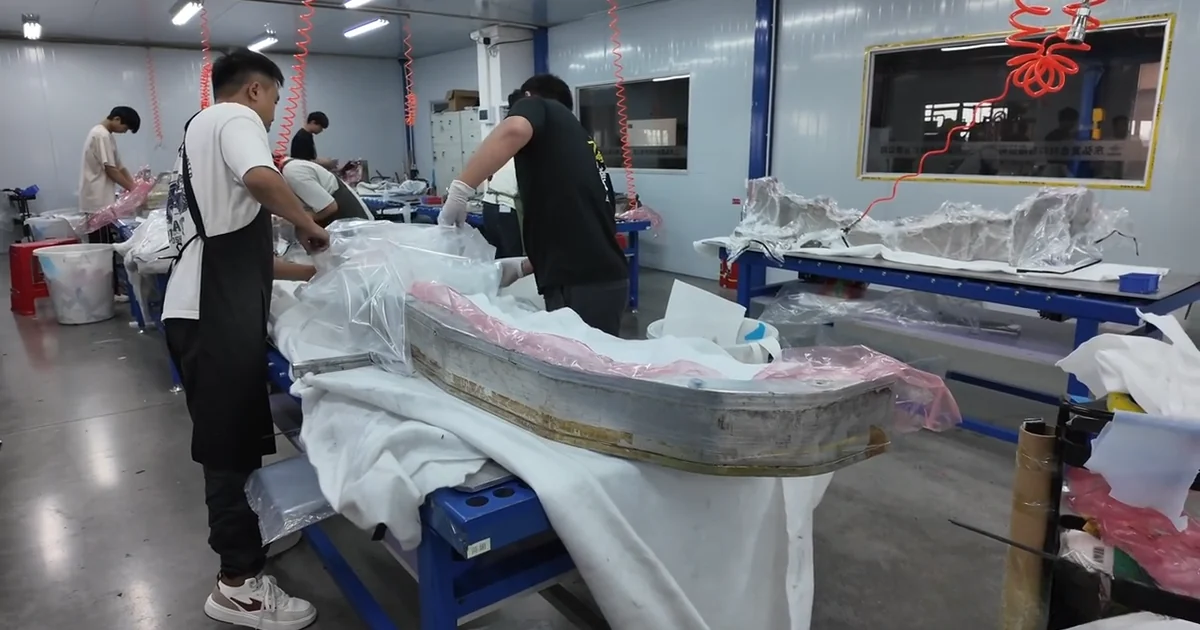
Construction and Materials
Real Carbon Fiber vs Carbon-Look Plastics
Real carbon fiber lip spoiler components use CFRP with structural reinforcement. Carbon-look ABS is cosmetic and has lower rigidity and thermal stability.
Process Comparison
| Process | Fiber/Resin Control | Consistency | Cost |
|---|---|---|---|
| Wet layup | Lower | Variable | Lower |
| Vacuum infusion | Medium-high | Good | Medium |
| Pre-preg + controlled cure | High | Best | Higher |
Installation Standard for Daily and Highway Use
- Clean surfaces with isopropyl alcohol.
- Dry-test fit and mark alignment using painter’s tape.
- Apply adhesion promoter where specified.
- Set tape, then secure centerline first with mechanical fasteners.
- Install side fasteners progressively to distribute load.
- Allow 24–48 h cure before wash/high-speed operation.
- Re-torque and inspect after 100–150 miles.
Engineering note: For reduced micro-deflection, use at least one mechanical fastener every 7–9 in (178–229 mm) along high-load zones.
Quality-Control Checklist Before Shipment
- Weave uniformity and cosmetic layer continuity.
- Edge trim uniformity and burr-free finish.
- Mounting tab thickness and hole-position verification.
- Clear-coat depth and UV-protection validation.
- Protective packaging at corners and leading edges.
Expertise and Technical References
Material science context: CompositesWorld.
Manufacturing fundamentals: Complete Guide to Carbon Fiber.
Reviewed by: Marcus Chen, Lead Product Engineer (CFRP product development, fitment validation, and installation protocol testing).